

n8n tutorial-1: Newsletter Subscription Agent with Gmail Confirmation
n8n tutorial: Newsletter Subscription Agent with Gmail Confirmation - Outline
- Introduction
- Start N8N
- On Form Submission
- AI Agent
- Ollama Chat Model
- Google Cloud Console
- Append row in sheet in Google Sheet
- Gmail Confirmation
- Conclusion
Introduction
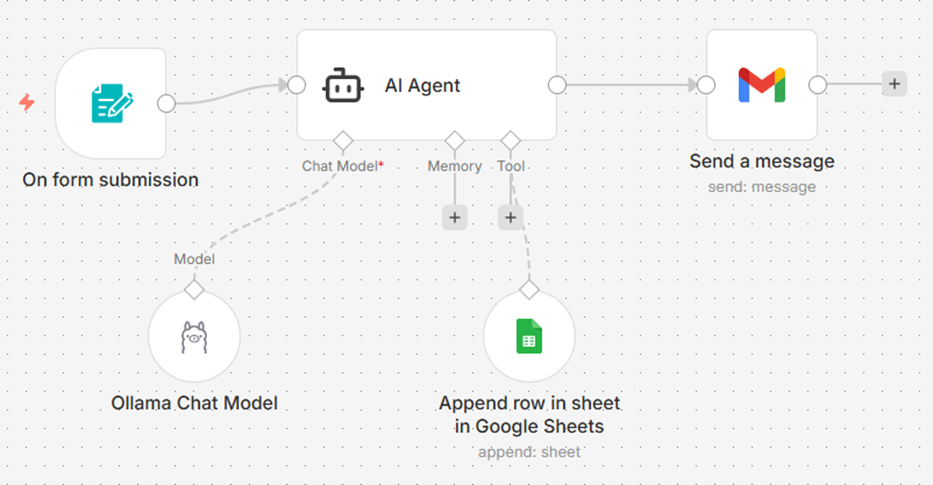
This tutorial demonstrates how to build a real-world AI agent using the n8n automation platform to streamline newsletter subscriptions. The instructor guides viewers through setting up a trigger node that captures user data via a web form and processes it using the Ollama qwen2.5(7 billion parameter) model. Key steps include integrating third-party APIs such as Google Sheets for database management and Gmail for sending automated, professionally designed confirmation emails. The source also explains how to configure API credentials and local environments to ensure seamless communication between different software tools. Ultimately, the guide illustrates how to transform a manual data entry task into a fully automated workflow capable of running independently.
Start N8N
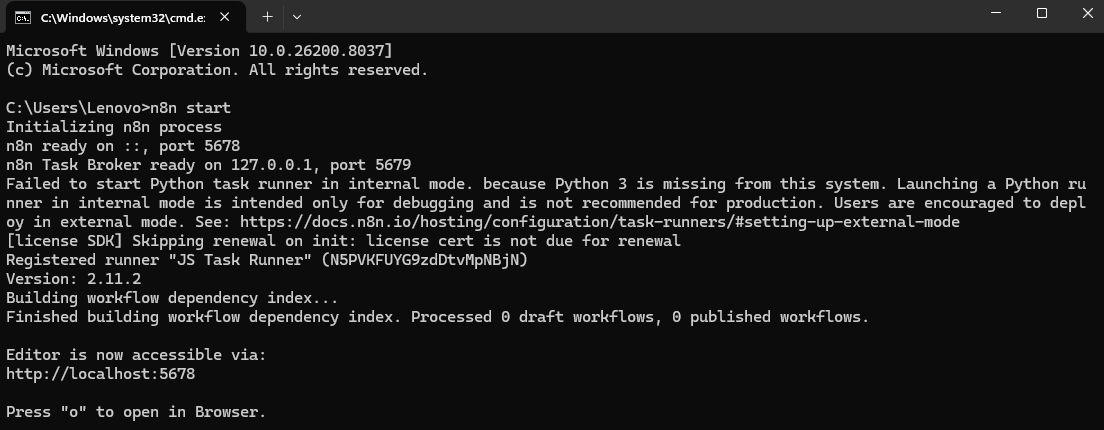
To begin using the n8n automation platform on a Windows system, you must first launch it through the command prompt (cmd) by entering the specific command n8n start. Once the application is running, the workflow editor becomes accessible via your web browser at the local address http://localhost:5678.
On Form Submission
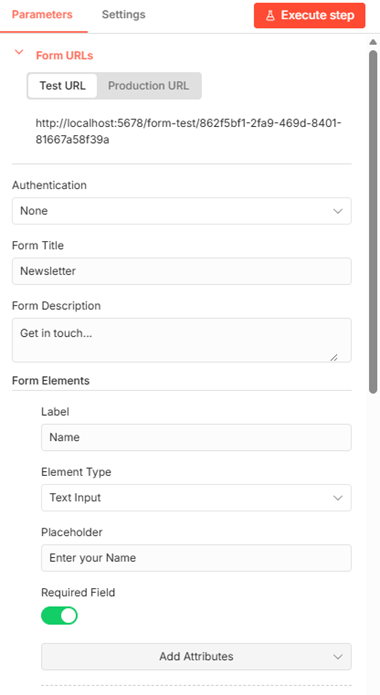
To configure the Newsletter form fields within the On Form Submission trigger node, use the following settings:
- Authentication: Set to <none>.
- Form Title: Enter Newsletter.
- Form Description: Enter Get in Touch.
You will need to add three specific form elements with these configurations:
- Name:
- Label: Name
- Element Type: Text Input
- Placeholder: Enter Your Name
- Required Field: Yes
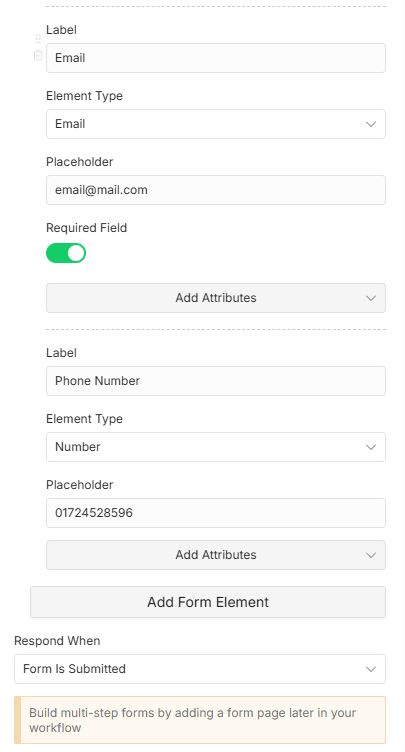
- Email:
- Label: Email
- Element Type: Email
- Placeholder: email@mail.com
- Required Field: Yes
- Phone Number:
- Label: Phone Number
- Element Type: Number
- Placeholder: Enter your phone number
- Required Field: No
Newsletter form properties is like below,
| Label | Element Type | Placeholder | Required Field |
|---|---|---|---|
| Name | Text Input | Enter Your Name | Yes |
| email@mail.com | Yes | ||
| Phone Number | Number | Enter your phone number | No |
AI Agent
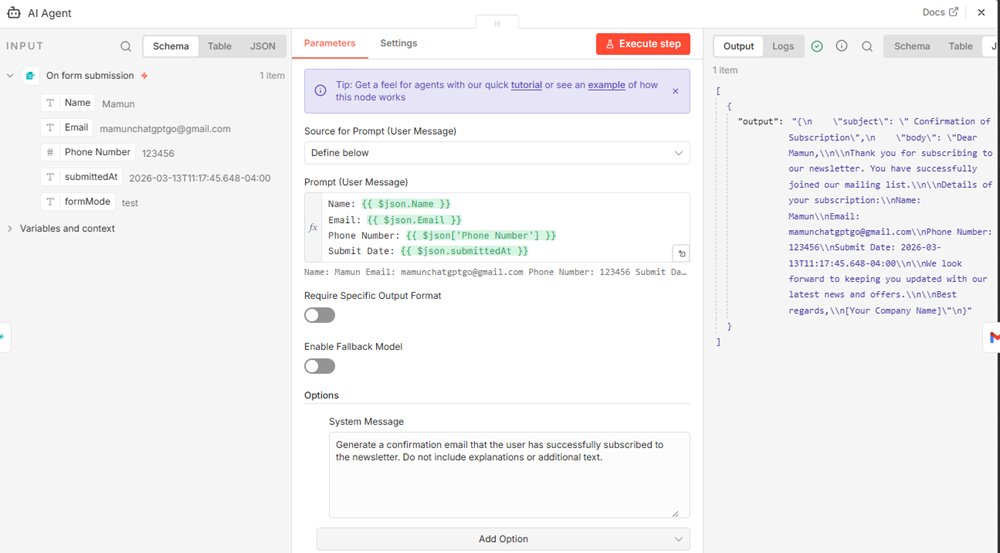
To set up the AI Agent prompt within the n8n workflow, you need to configure both the User Message and the System Message to ensure the agent processes the subscriber data correctly.
1. User Message (Prompt)
In the Prompt (User Message) field of the AI Agent node, you should map the data captured from the newsletter form.
Source for Prompt (User Message): <Define Below>
Use the following structure to include the dynamic variables:
- Name: {{ $json.Name }}
- Email: {{ $json.Email }}
- Phone Number: {{ $json["Phone Number"] }}
- Submit Date: {{ $json.submittedAt }}
2. System Message
The System Message provides the core instructions for the AI Agent's behavior. You should enter the following instruction to ensure the agent generates the correct output without unnecessary conversational filler:
- Instruction: "Generate a confirmation email that the user has successfully subscribed to the newsletter. Do not include explanations or additional text".
By setting these fields, the AI Agent will take the specific user data and transform it into a professional confirmation email as part of the automated sequence.
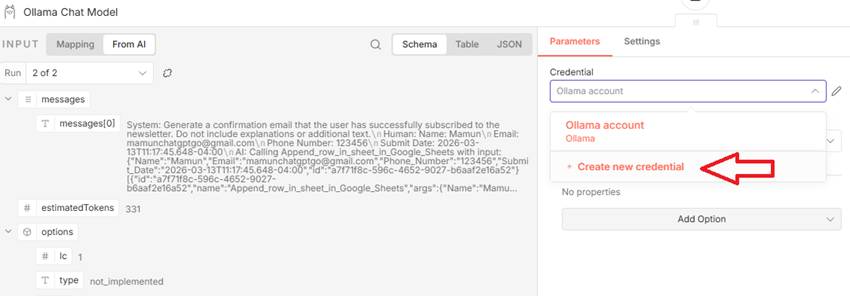
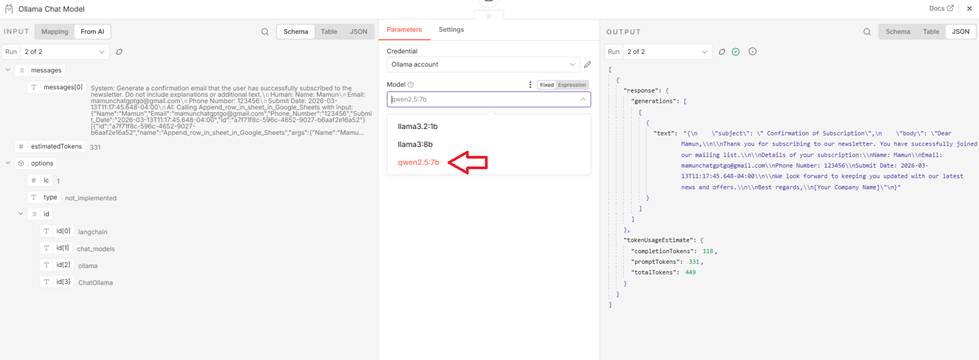
Ollama Chat Model
To connect the Ollama Chat Model to your n8n workflow, follow these steps:
- Install Ollama: Download and install the software from the official Ollama website (https://ollama.com/).
- Download the Model: Open your command prompt (CMD) and run the command
ollama run qwen2.5:7bto download and install the Qwen2.5 (7 Billion parameter) model ( https://ollama.com/library/qwen2.5:7b). - Verify the Connection: You can check if the API is running by visiting
http://localhost:11434/api/tagsin your web browser.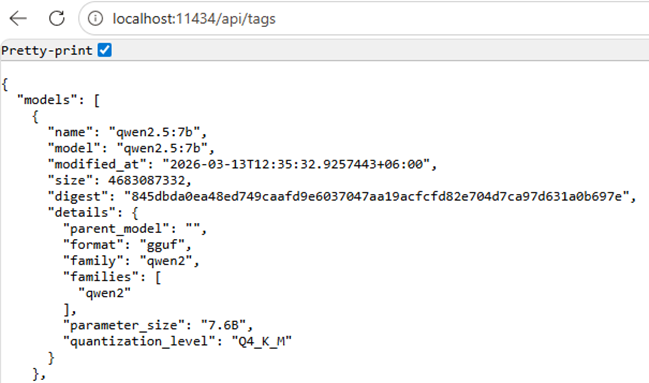
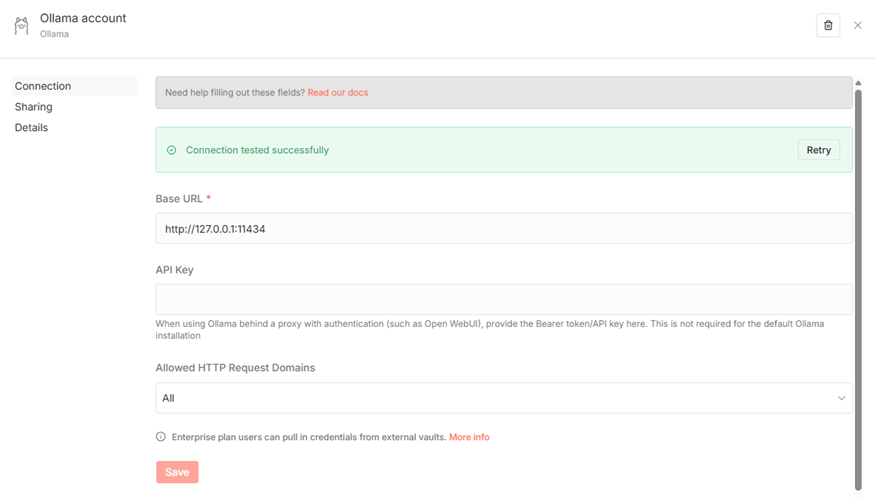
- • Configure in n8n: If you are running n8n within a Docker container, use the following URL to connect to your local Ollama instance: http://host.docker.internal:11434.
Google Cloud Console
To set up the Google Cloud Console credentials for your n8n workflow, follow these steps:
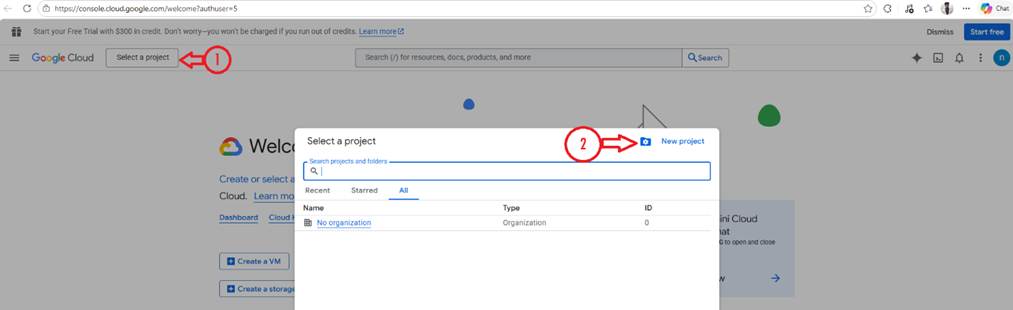
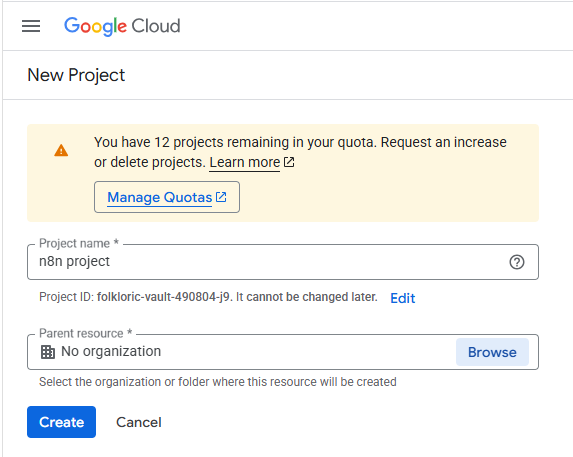
1. Create the Project
Go to the Google Cloud Console (https://cloud.google.com/cloud-console).

Create a new project with the name "n8n project". After create the project, You can see, a notification for n8n project.

- From the left sidebar menu, navigate to APIs & Services > Credentials and ensure your "n8n project" is selected.

From left sidebar toggle menu, select APIs & Services> Credentials
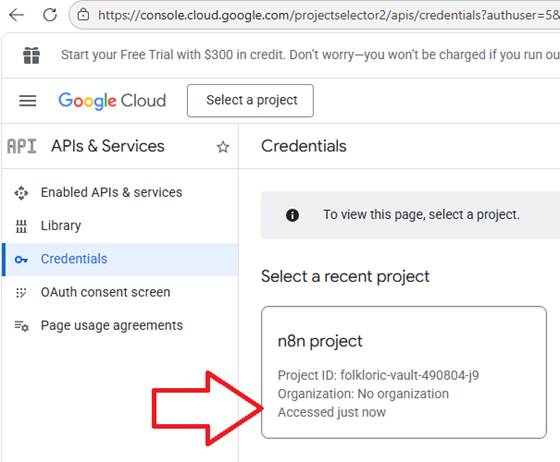
Select n8n project.
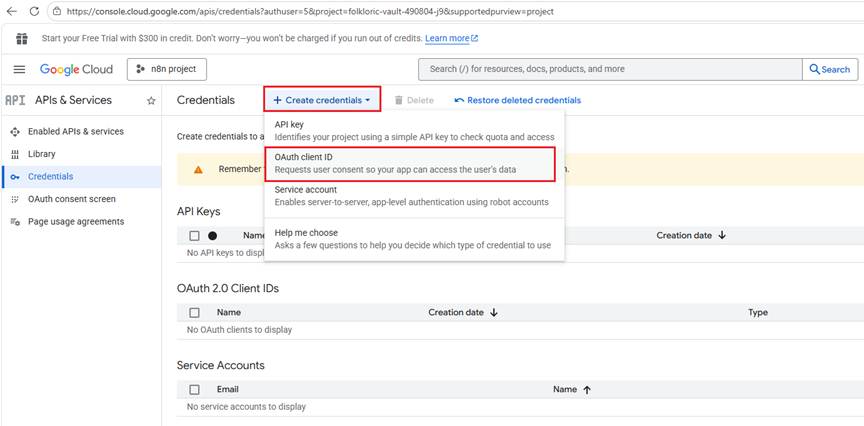
Select: + Create Credentials > OAuth client ID
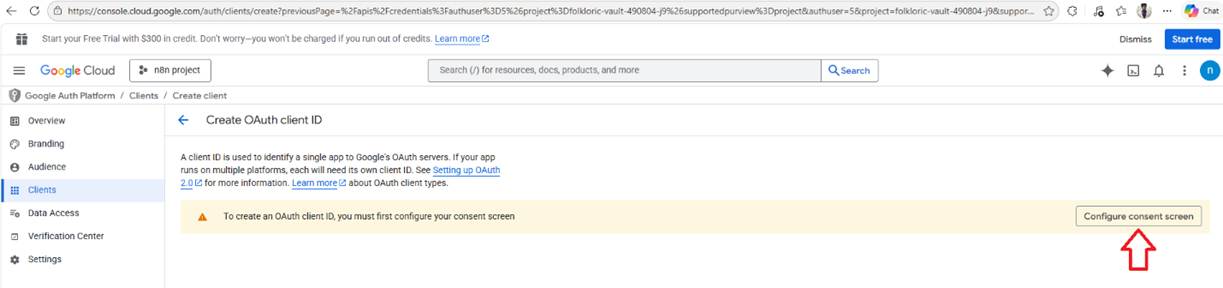
Now create Google Auth Platform by click the button Get started.

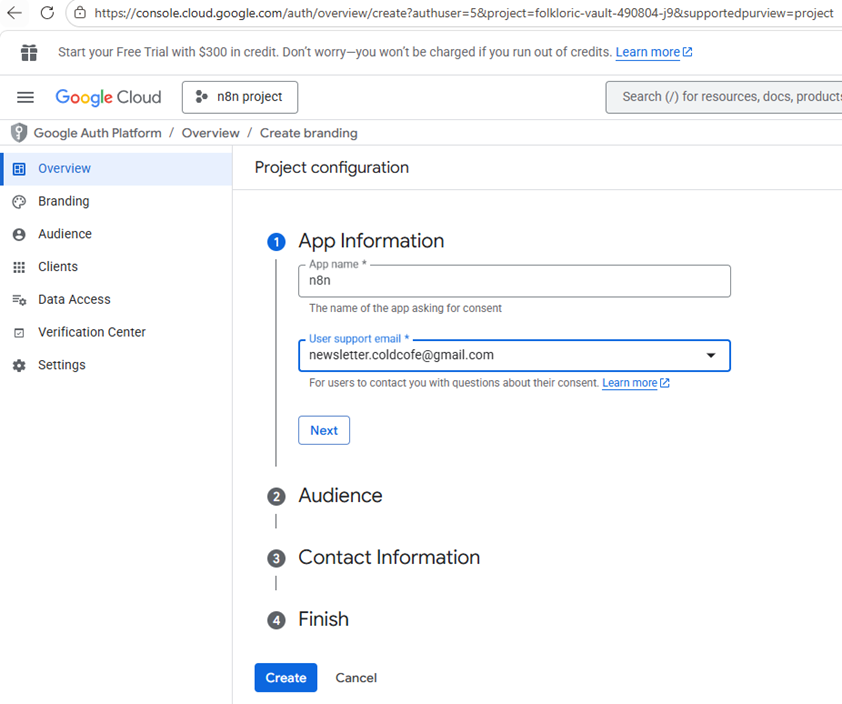
Set app name as n8n and select the user support email.

Select audience External
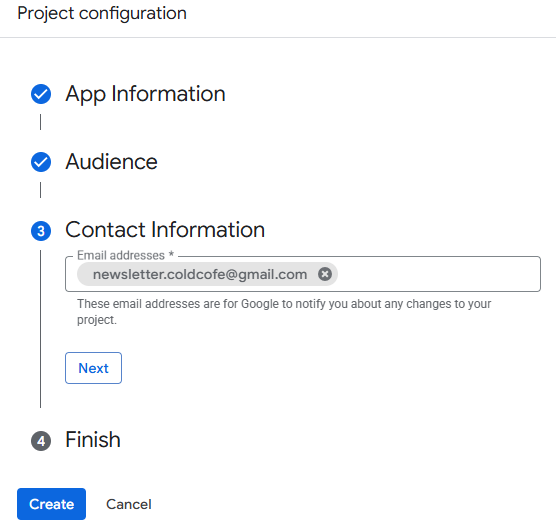
Set email address for contact and click next button
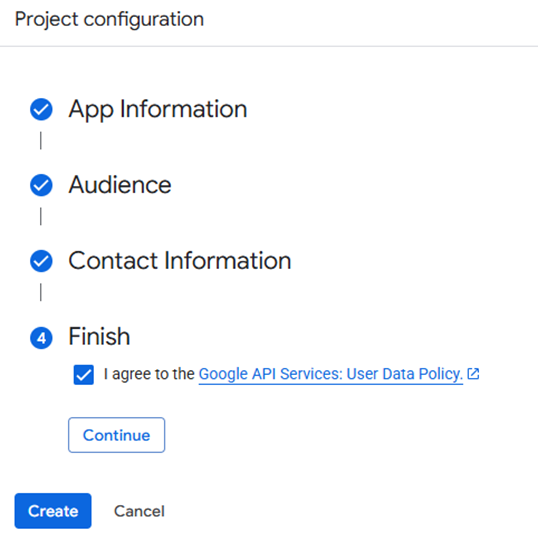
Select I agree checkmark and click to continue
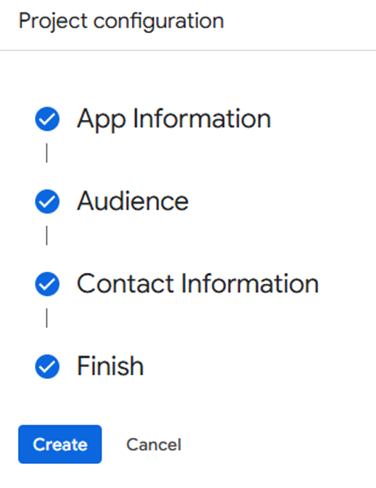
All done, click create.
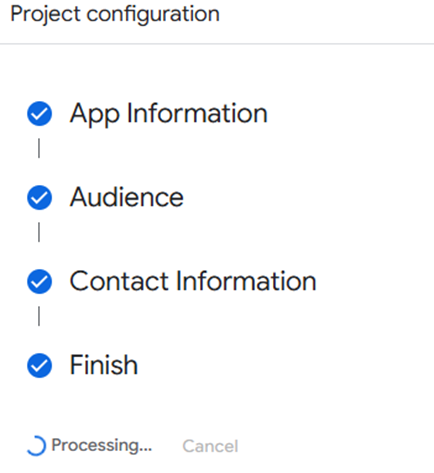
It will start processing for project configuration.
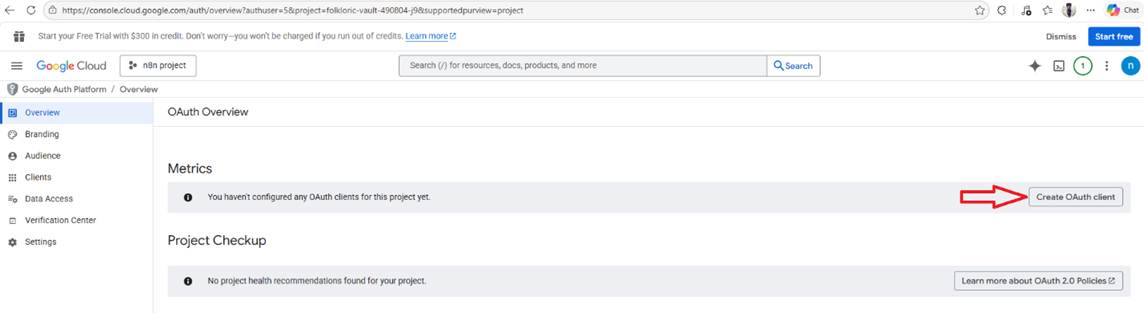
From OAuth Overview, click button Create OAuth Client.
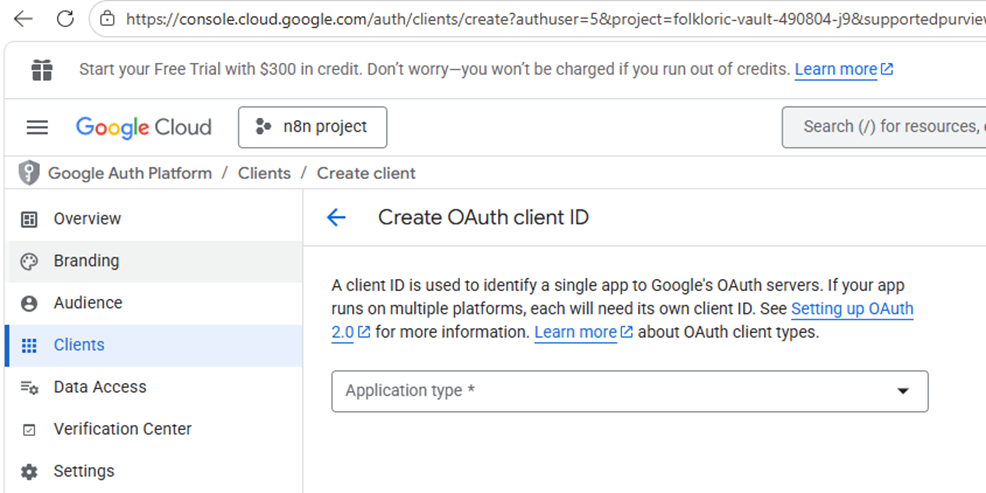
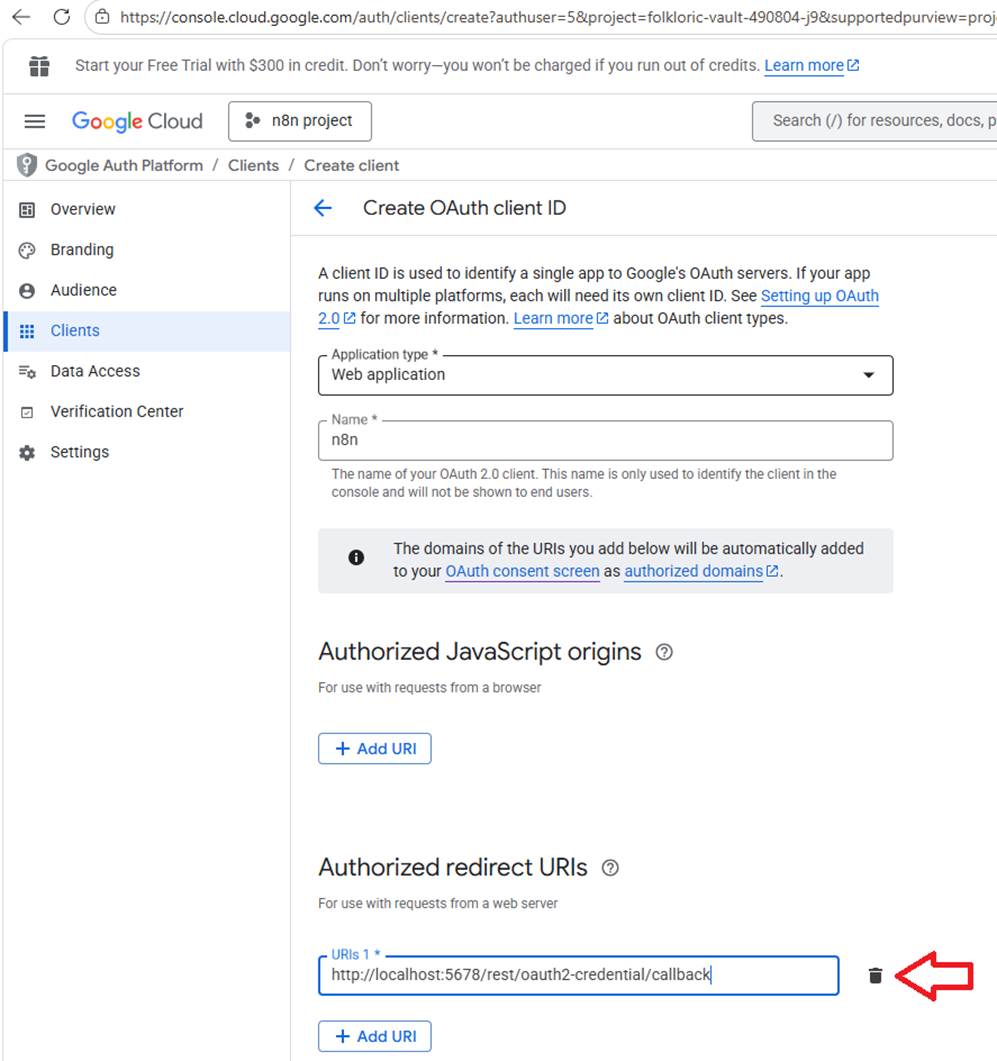
Now you have entered the Create OAuth client ID.
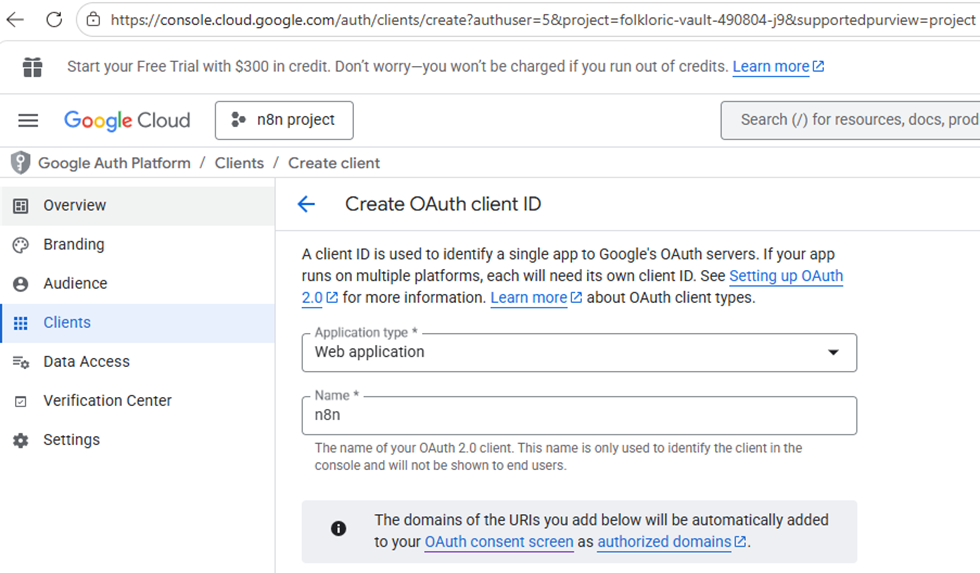
From create OAuth client ID, write Application type: Web application | name: n8n.
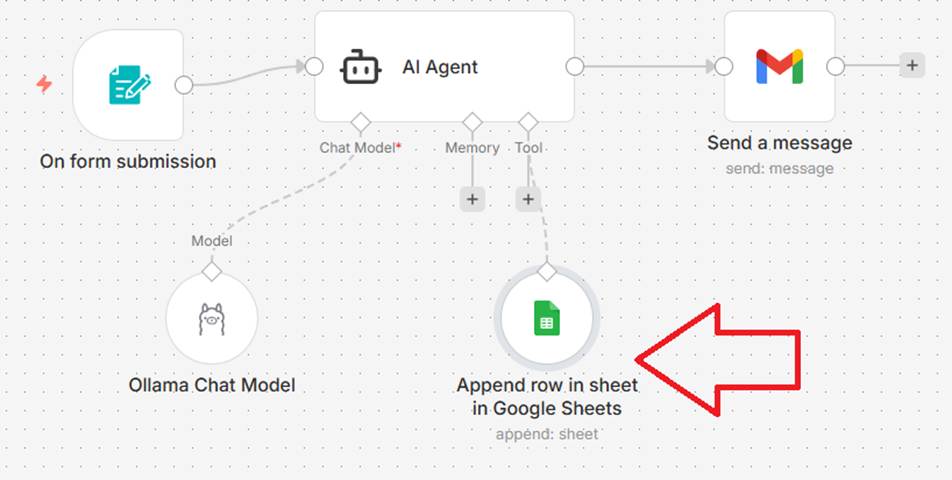
Now, go back to the n8n workflow panel, and double click on the Append row in sheet in Google Sheet item.
From Google Sheets Account, copy the OAuth Redirect URL.
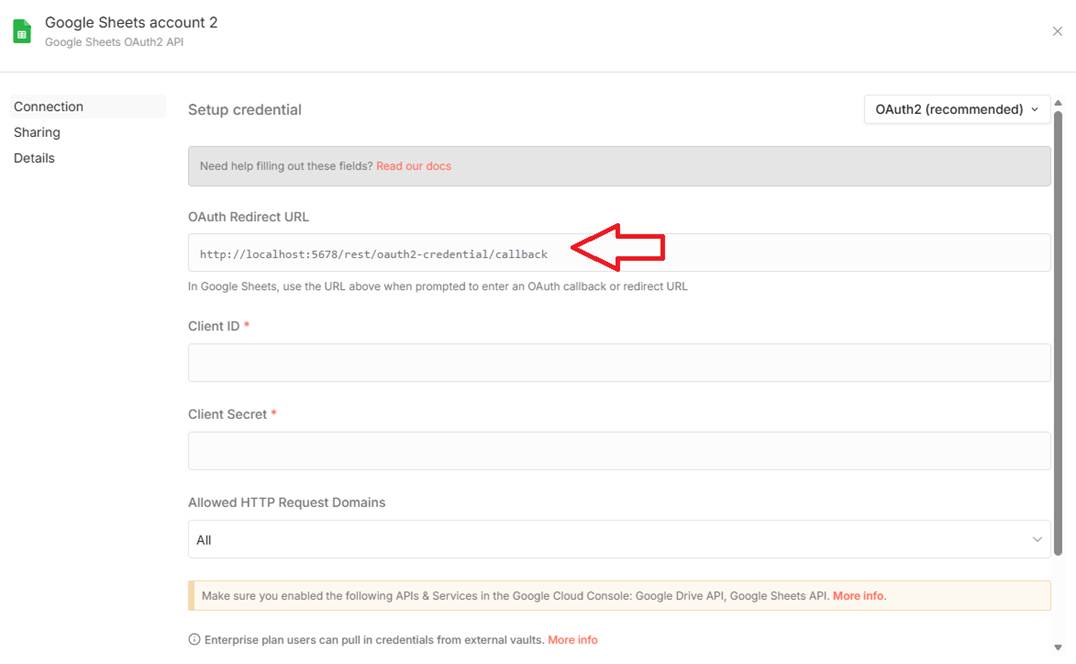
Now back to the Google Cloud Console, and paste the authorized redirect URIs.
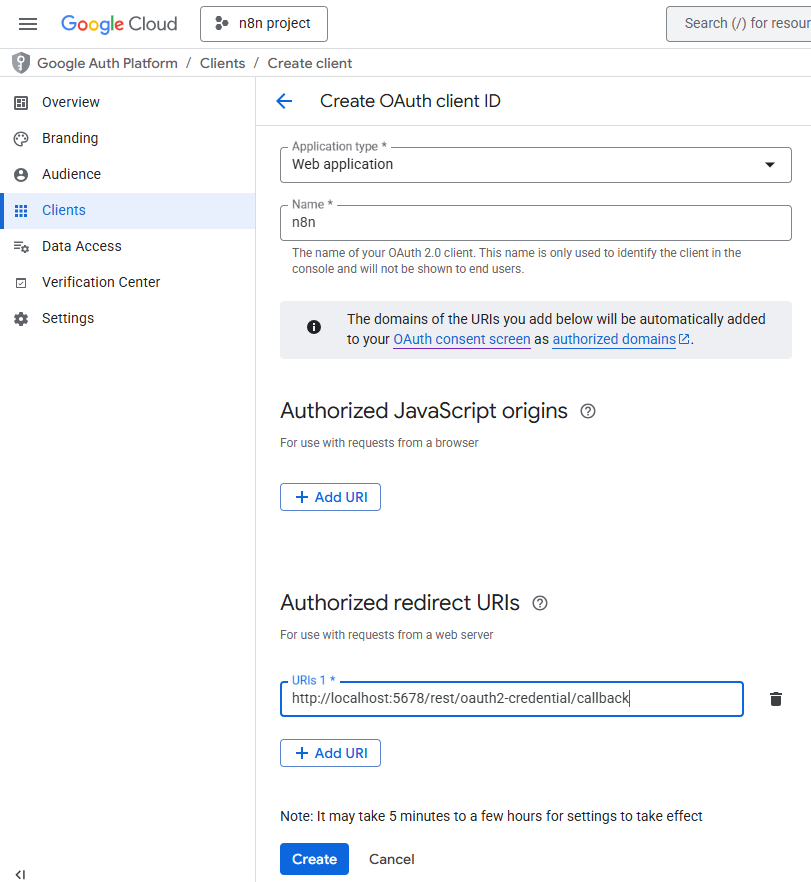
Now, click create to Create OAuth client ID
Now, you can see the OAuth 2.0 Client IDs and click Edit


Now, you will get the Client ID and Client Secrets. Also, you can download the .json file.
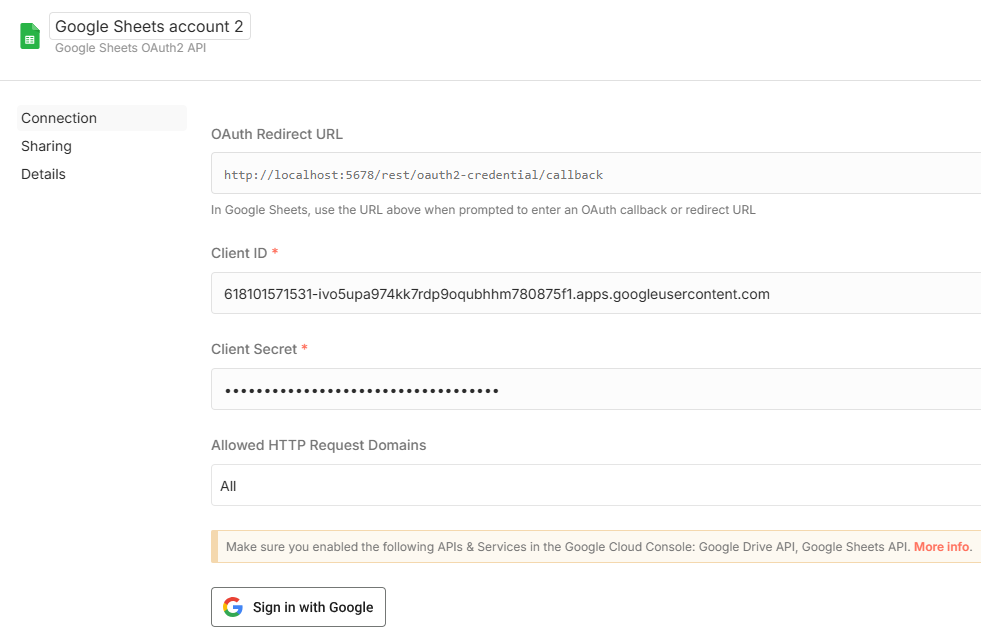
Now back to the n8n workflow and go to the Append row in sheet in Google Sheet item.
you can place the Client ID and Client Secrets to the google sheet OAuth API.
You can also use these same credentials (the Client ID and Client Secret) to connect the Gmail node to your workflow
Append row in sheet in Google Sheet
To map columns in the Append row in sheet in Google Sheet node, follow these configuration steps:
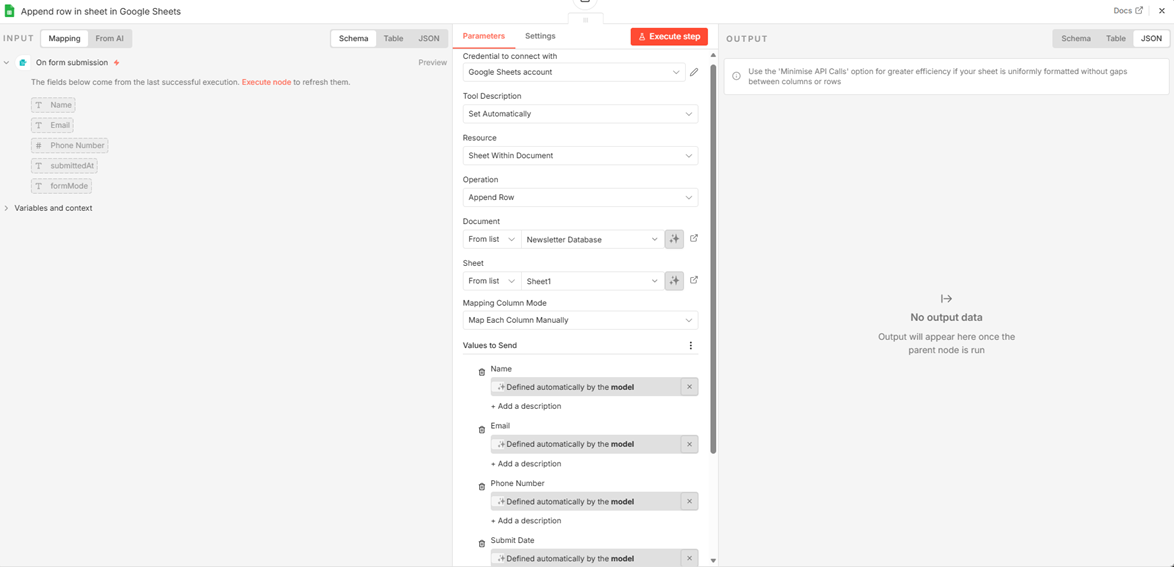
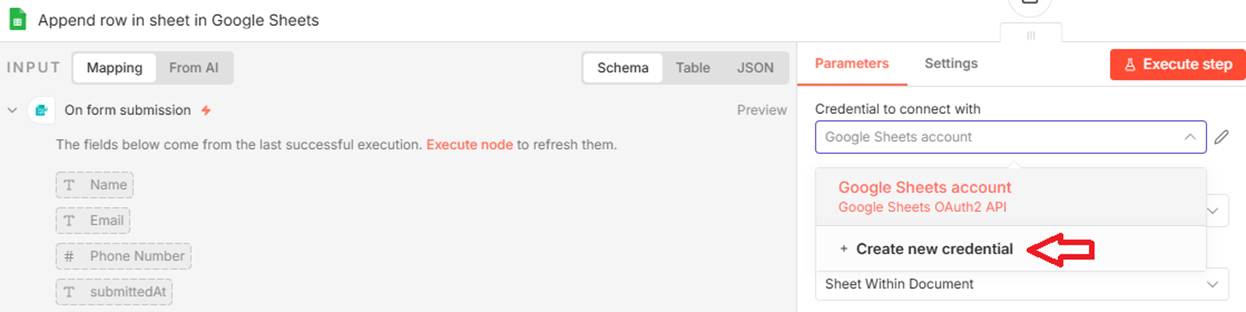
Credential to connect with: <+create new credential>
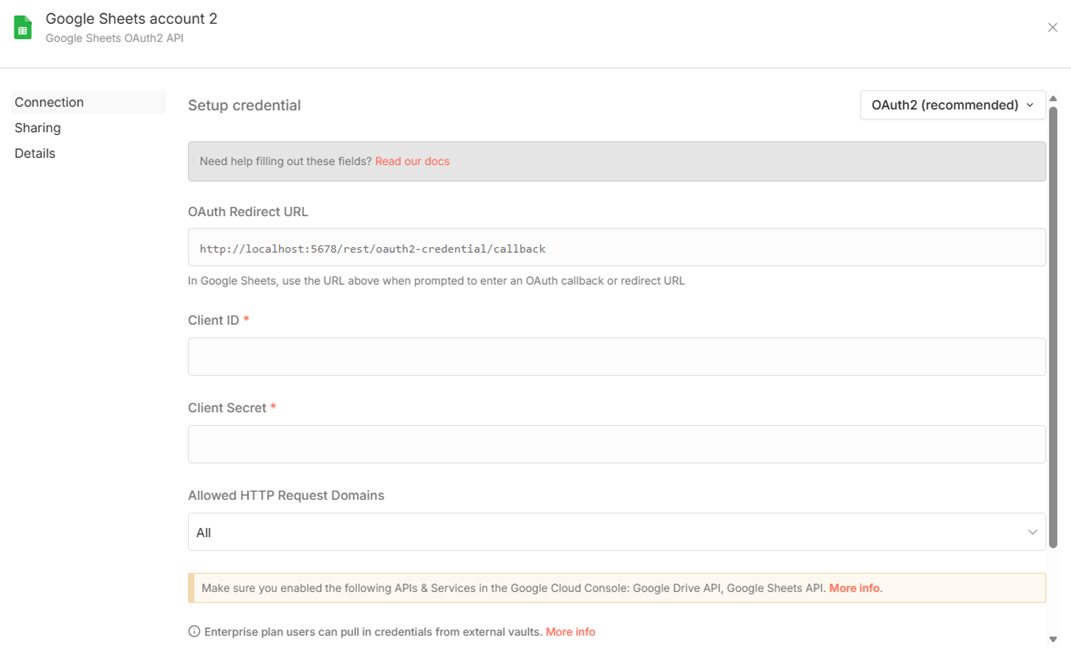
According to the google cloud console, placed “Client ID” and “Client Secret”.
- Tool Description: Set Automatically
- Resource: Sheet within document
- Operation: Append Row
- Document: select google sheet name from dropdown
- Sheet: select name of the sheet of google sheet
- Mapping Column Mode: Map each column manually
- Value to send: Define automatically by the model
You can place the “Client ID” and “Client Secrets” to the Google Sheet OAuth API.
Now click “Sign in with Google” then it will connect automatically.
This setup ensures that the data captured from your newsletter form is correctly directed to the appropriate columns in your Google Sheet.
Gmail Confirmation

To configure the Gmail node to send automated confirmation emails, follow these steps based on the sources:
- Credential to connect with: Select <+create new credential> and enter the Client ID and Client Secret you generated in the Google Cloud Console.
- Resource: Set this to Message.
- Operation: Set this to Send.
- To: Use the Drag & Drop feature to map the email address specifically from the "On form submission" node.
- Subject: Manually enter the text you wish to use as the email's subject line.
- Email type: Select either HTML or Text depending on your design preference.
- Message: This field will be set automatically, typically drawing from the output of the preceding AI Agent node.
Once these fields are configured, the Gmail node will be ready to send the AI-generated confirmation emails to your new subscribers.
Conclusion
Building an AI agent with n8n transforms the way you handle information. You have moved from a simple form submission to a sophisticated sequence: an AI processes data, logs it into a secure database, and sends a designed, automated confirmation email. Now, that you hold the blueprint for a self-acting system, look at your own daily workflow. What other "boring" tasks could you delegate to an AI agent? Once you master the plumbing of APIs and the logic of nodes, you aren't just using tools you are building systems.
